In these series I’d like to share my thoughts on building quick and approachable GitLab demo using as much as possible features and capabilities with less effort and keep cost slim as well. You may also want to check my first 6 months reflection on being part of the GitLab organisation.
I start with a GitLab instance and for the demo I am going to use Community Edition (since it does not require any commitments, but the same approach is possible to apply to EE). This is a good page to figure out what editions are available.
In my opinion (but of course depends on what is available atm) the quickest way for demo purposes to have an up and running self managed instance would be a docker container. All available options for installation are listed here. I’ll be running it locally on my computer, I am going to issue a self signed certificate first.
Self Signed Certificate #
In cryptography and computer security, self-signed certificates are public key certificates that are not issued by a certificate authority (CA). These self-signed certificates are easy to make and do not cost money. However, they do not provide any trust value.
There is also a cheat sheets repo that contains all the steps below.
Root CA #
In cryptography, a certificate authority or certification authority (CA) is an entity that stores, signs, and issues digital certificates. A digital certificate certifies the ownership of a public key by the named subject of the certificate. This allows others (relying parties) to rely upon signatures or on assertions made about the private key that corresponds to the certified public key. A CA acts as a trusted third party—trusted both by the subject (owner) of the certificate and by the party relying upon the certificate.[1] The format of these certificates is specified by the X.509 or EMV standard.
Generate root CA #
- Generating RSA private key
1openssl genrsa -aes256 -out rootCA.key 4096
- Generate a root CA certificate
1openssl req -x509 -new -nodes -key rootCA.key -sha256 -days 1024 -out rootCA.pem
- View certificate’s content
1openssl x509 -in rootCA.pem -text
This should give two files:
1├── rootCA.key
2└── rootCA.pem
Certificate #
Since Chrome 58 we have to define SAN (Subject Alternative Name) instead of CN (see) This change requires passing extra configuration to openssl while generating certs.
- Generating RSA private key
1openssl genrsa -aes256 -out cert.key 4096
- Add the
san.cnffile for Subject Alternative Name
 1authorityKeyIdentifier=keyid,issuer
 2basicConstraints=CA:FALSE
 3keyUsage = digitalSignature, nonRepudiation, keyEncipherment, dataEncipherment
 4subjectAltName = @alt_names
 5
 6[alt_names]
 7DNS.1 = weekendsprints.local
 8DNS.2 = gitlab.local
 9DNS.3 = gitlab-runner.local
10DNS.4 = localhost
- Create a Certificate Signing Request (CSR)
1openssl req -new -sha256 -nodes -key cert.key -out cert.csr
- Generate a certificate
1openssl x509 -req -sha256 -days 36500 -in cert.csr -CA rootCA.pem -CAkey rootCA.key -out cert.pem -extfile san.cnf -CAcreateserial
- View certificate’s content
1openssl x509 -text -in cert.pem -noout
This should give another four files (including san.cnf):
1├── cert.csr
2├── cert.key
3├── cert.pem
4├── rootCA.key
5├── rootCA.pem
6└── san.cnf
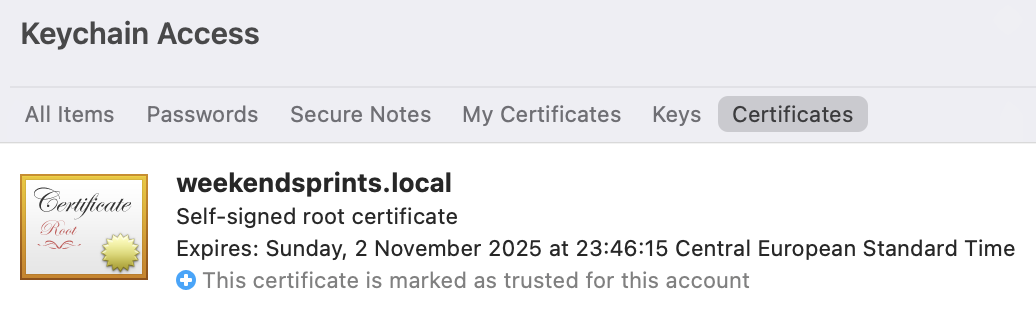
Trust to root CA #
- mac OS
Root CA certificate has to be added to Keychain Access and set to trust.
- RHEL 8
On Red Hat Enterprise 8.6 you should add rootCA.pem file to /etc/pki/ca-trust/source/anchors/ and refresh trusted root certificates by running: update-ca-trust extract
- Debian / Ubuntu
On Debian / Ubuntu root CA goes to /usr/local/share/ca-certificates/ and has to be refreshed with command: update-ca-certificates. Keep an eye on the file’s extension, it should be .crt!
- Docker
If you need to container with certificate (for example nginx), you need /usr/local/share/ca-certificates/. Keep an eye on the file’s extension, it should be .crt!
- Windows
Powershell:
1Import-Certificate -FilePath "rootCA.pem" -CertStoreLocation Cert:\LocalMachine\Root
Set
-CertStoreLocationtoCert:\CurrentUser\Rootin case you want to trust certificates only for the logged in user.
CMD:
1certutil.exe -addstore root rootCA.pem
certutil.exeis a built-in tool (classicSystem32one) and adds a system-wide trust anchor.
Run GitLab #
I am going to run GitLab CE using latest docker image as outlined here, but also adding my self signed certificate in the mix:
 1#!/bin/bash
 2
 3export GITLAB_HOME=
 4
 5docker run --detach \
 6  --hostname mac.local \
 7  --publish 443:443 --publish 80:80 --publish 22:22 \
 8  --name gitlab \
 9  --restart always \
10  --volume $GITLAB_HOME/config:/etc/gitlab \
11  --volume $GITLAB_HOME/logs:/var/log/gitlab \
12  --volume $GITLAB_HOME/data:/var/opt/gitlab \
13  --shm-size 256m \
14  gitlab/gitlab-ce:latest
GITLAB_HOME- make sure to set the home path for GitLab that will hold all states generated by container (i.e. postgreSQL data, logs, configs).- HTTPS can be enabled by setting
external_urlto https:// in/etc/gitlab/gitlab.rb(could also be done after execution of the container) - Certificate location is
/etc/gitlab/ssland nothing is needed to configure if both private key and public certificate file names mimic hostname. Check
 1
 2tree config
 3
 4config
 5├── gitlab-secrets.json
 6├── gitlab.rb
 7├── ssh_host_ecdsa_key
 8├── ssh_host_ecdsa_key.pub
 9├── ssh_host_ed25519_key
10├── ssh_host_ed25519_key.pub
11├── ssh_host_rsa_key
12├── ssh_host_rsa_key.pub
13├── ssl
14│   ├── mac.local.crt <=== this is public certificate
15│   ├── mac.local.key <=== this is private key
16│   └── password      <=== this is passphrase (if set)
17└── trusted-certs
and here is my gitlab.rb:
1external_url 'https://mac.local'
2nginx['ssl_password_file'] = '/etc/gitlab/ssl/password'
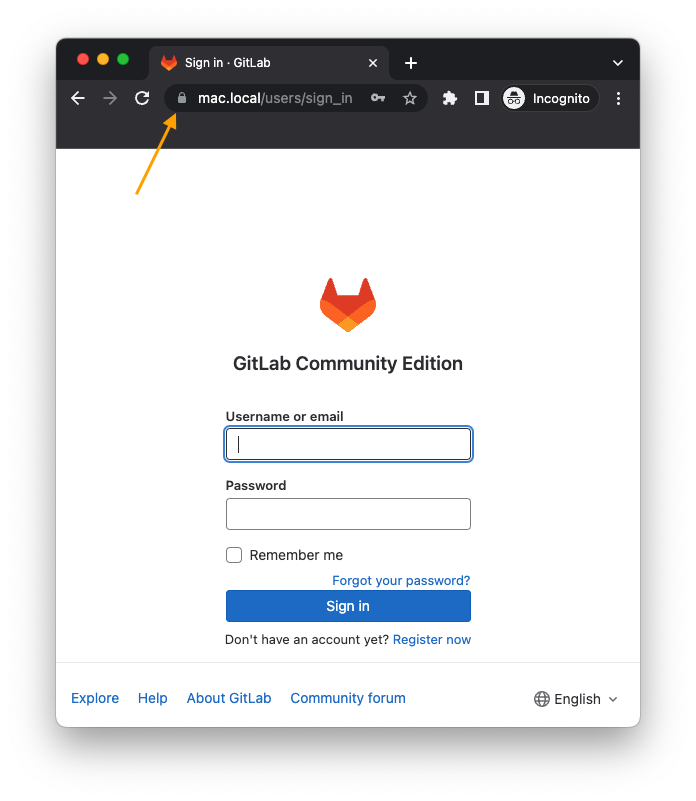
Now with the browser:
Configure GitLab #
Now so that we have GitLab up and running let’s make couple of manipulations with it. Get into the container (if you are using Docker Desktop then it’s possible to do via GUI), otherwise:
 1docker exec -it gitlab /bin/bash
 2
 3# Once you are in container:
 4
 5root@mac:/# gitlab-rake gitlab:env:info
 6root@mac:/# gitlab-ctl reconfigure <=== this is how to apply changes in gitlab.rb to running instance
 7root@mac:/# gitlab-ctl restart     <=== this is how to apply changes in gitlab.rb to running instance
 8
 9root@mac:/# gitlab-rails console   <=== this is how to get into rails console (i.e. to change password of root user):
10
11irb(main):011:0> user = User.first
12=> #<User id:1 @root>
13irb(main):012:0> user.password_confirmation = 'P@$$w0rd'
14=> "P@$$w0rd"
15irb(main):013:0> user.password = 'P@$$w0rd'
16=> "P@$$w0rd"
17irb(main):014:0> user.save!
18=> true
19irb(main):015:0>
That’s it!